Posts

Showing posts with the label art

Bathroom Art With PhotoWall

Image
Every room needs art. Whether it be a canvas or framed, art kind can complete a space. It adds texture to the space and another dash of color and interest. We are in the process of designing our master bathroom and want it to feel like a retreat. We want to enter a spa every time we walk in. All the cares of the world to just fall away when we're in it. When choosing art for the bathroom, I wanted soothing color and theme. When PhotoWall reached out to try one of their canvas prints, I knew exactly what I wanted. A little piece of nature. I chose the Stones canvas. I love the serene feeling that this piece gives off. The colors are soothing and the stones are very spa-like. One of the good things about purchasing from PhotoWall is that you can choose the size you want to best fit your space. You can go so far as cropping and changing the actual objects in the picture. If there's a dinosaur in the picture on the website, you can choose to make it a dog. Now that's cus...

DIY Paint Stick Wall Art

Image
Every time I go into Home Depot, I grab a few paint sticks.  I figure I can never have enough.  My stash was pretty good so I decided it was time to do something with them.  I wanted to make some kind of wall art.  I saw this one a while back and was inspired to create my own using different materials. I started out with a piece of foam board I had in the closet.  It was the perfect size for the wall I was using.  I had some regular paint sticks and four of the larger ones. I placed them around the outside of my board to figure out the cuts I needed to make. I cut the rounded sides off using my miter box.   After my frame was cut using the larger paint sticks, I began cutting the smaller ones.  I cut random lengths to fit into the frame.  I wanted a staggered look so there really was no measuring.   After all my cuts were made, I painted the pieces.  I used blue and green craft paint for my color sc...

Some Art For The Living Room

Image
I can finally say there isn't a blank wall above the sofa anymore.  It took a few tries to find the right piece that we both liked but I think we're happy with this one.   It pulls all the colors from downstairs into one piece.  It's even got a little green which I wasn't sold on in the store but kind of like now.  Hubby liked the leaf as a focal point and it plays well with the vines and leaves in the chairs.   I also found a new lamp for the corner.  I wanted a drum shade and loved the tripod legs of this one from Target.   We're a little closer to complete in here.  Still would like to find some pillows that pop and definitely a rug.  Although, I've gotten kind of used to a rug not being in here.  

Easy Giraffe Art

Image
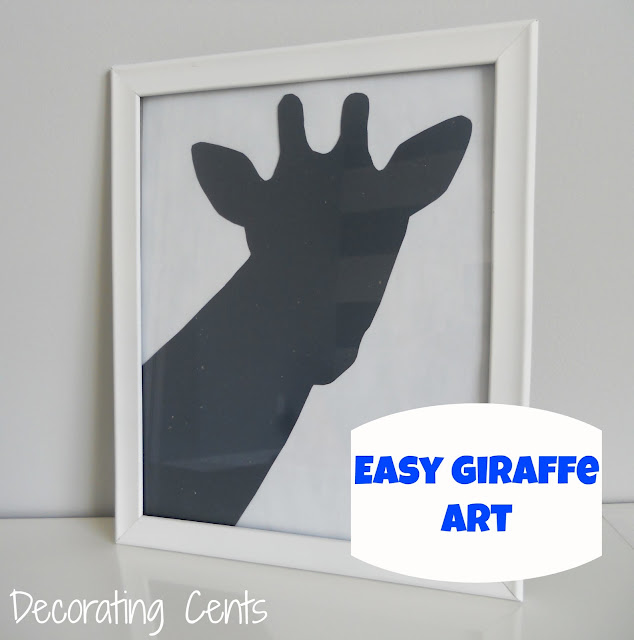
Here's some easy art for the nursery.  I wanted some inexpensive art to put on the shelf above the changing table .  This project took nothing more than a frame and scrapbook paper.  I've had this pinned and decided to give it a try. I searched for giraffe heads on google and printed it out l arge enough to f ill my frame.  I cut it out, traced it onto scrapbook paper, and glued it to white paper .  I had an extra frame laying around and popped it in. Super chea p and super easy. For more nursery progress: Nursery Plans Striped Wall DIY Photo Mattes DIY Nursery Prints Chair Options Light Option s The Nursery Light Toy Storage Ide as DIY Elephan t Mo bile Sharing with A Bowl Full of Lemons * Home Stories A to Z * Not Just a Housewife * Southern Lovely * DIY by Design * Savvy Southern Style * Clean and Scentsible *

DIY Nursery Prints

Image
Since this is a nursery, I knew I wanted some cute prints.  There were several out there on Etsy and other websites but I wanted to try making my own.  This way, I could customize them with the images and colors I wanted. With the help of hubby and Photoshop, here's what I came up with. I pulled the colors and animals from the bedding.  Of course the orange had to be in there.  I printed them out and put them in my DIY matted frames . Now that I'm starting to play around with Photoshop, I can make the art in this room much more personal.  I've got a few other ideas in mind. For more nursery progress: Nursery Plans Striped Wall DIY Photo Mattes Sharing with DIY Show off * I Heart Naptime * Setting For Four * Under the Table and Dreaming * Be Colorful * Between Naps on the Porch * Craftomaniac * DIY H ome Sweet H ome * Keeping It Simple * Making the World Cuter * Marvelously Messy * Project Inspire * ...

DIY Photo Mattes

Image
Since I'll be putting prints in the nursery, I figured I would need some frames.  On a trip to Ikea, I made my way to the frames section.  Before going in I had already made my mind up that I would get the Ribba frames.  Before getting to the Ribba, I saw the Nyttja.  It was the same size as the Ribba I was going to get, but they didn't have the mattes in them.  Mattes are a major thing for me.  I just think they make a photo look better in the frame.  They were also lighter in weight which was a good thing since they would be hanging over the crib.  They were a few bucks cheaper and I was thinking of the money I would save.  I thought for a few seconds and decided I can make my own mattes.  How hard could it be?  I grabbed the frames and checked out. On the way home I went to the dollar store and got some poster board for my mattes.  At home, I laid out my supplies. frames poster board existing matte from another fra...

Pinterest Inspired Art

Image
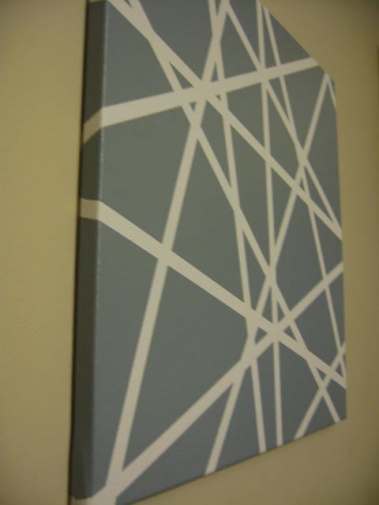
This pin has been on my project ideas board for a while.  I had bought some canvases some time ago but ended up returning them.  Not knowing when I would ever buy more canvases, I decided to create this project with some foam board I had in the closet.   I started by taping off my lines with painter's tape.  The tape I had was 1 inch but I cut the strips in half to make my lines thinner. Using blue and red craft paint, I randomly painted sections of my board.  After removing the tape, here's what it looked like.  I was surprised how easy the tape came off the foam board being that it's paper.  It was Elmer's board so maybe it made a difference but I've tried with dollar store boards before and the paper ripped.     I originally made these to go above the sofa in the living room, but changed my mind.  They were a little too bright for the space.  One of them ended up in the back hall coming in from ...

Foyer Subway Art

Image
I've been wanting to do a piece of subway art for a while now.  I had passed many canvases in Michael's and Hobby Lobby but never actually picked one up.  I happened to be in Ikea on a random trip one day.  I always check the 'As Is' section on the way out.  They had just marked down a butt load of cabinet doors.  I grabbed one, not knowing exactly what would happen with it, checked out, and headed home. When I got home, I held it up against walls in the house trying to figure out where I was going to put it.  BINGO!  I can finally make a subway print.  I searched online for some words to use.  I had plenty of paint in the stash so I got to work. This is what I started with.  It's a ADEL cabinet door front. After a couple coats of paint, I laid out where my words would go.  I used blue tape to keep my letters level. I found a stencil in my daughter's art supplies and started tracing my letters.  I must ...