Posts

Showing posts from 2012

Wood Christmas Tree Sign

Image
Good morning friends.  It's a week before Christmas and I'm running like a mad woman trying to get last minute gifts and decorating the house for guests coming over for Christmas dinner.   I wanted to display something for Christmas that told the real reason we celebrate in our house.  I began to go through my drawers and the garage to see if I had any free supplies.  I came across some leftover paint sticks and had an idea.  I can make some art from it. I started by gathering my supplies.  I used paint sticks, stain, white paint, and a handmade stencil. I laid out my sticks to see how I wanted them arranged.   After deciding where each stick would go, using wire cutters, I cut each stick to size and sanded the rough edges.   On goes the stain.  I even used a small leftover piece and painted it yellow for my star at the top of the tree.   After the stain dried, I laid my stencil out.  My stencil was just card stock that I cutout the letters with

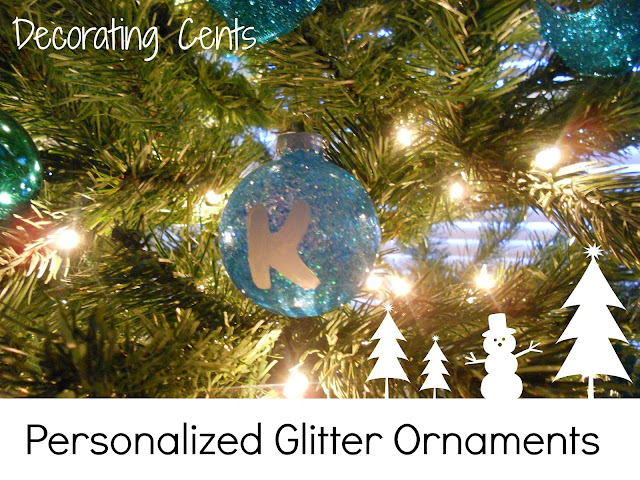
Personalized Glitter Ornaments

Image
Once again, I am doing blue and silver for Christmas colors this year.  I re-used the ornaments from last year and added some more blue to fill in some of the empty spots.  I wanted it to look a little fuller.  This year I also wanted to start something new, putting a handmade ornament on the tree each year.  To go with the blue theme, I decided to add some blue glitter and a little personalization for each one of us. I started with some clear plastic ornaments from Michaels, glitter, and floor cleaner. Take the tops off each of the ornaments.  Pour a little floor cleaner into the ball and swirl around.  Pour out any excess cleaner. Pour some glitter in the ball.  I made a funnel from paper to get it in the hole.  Put your finger over the hole and shake the glitter all around until it is evenly coated on the inside. The next step was personalizing each one.  I wanted each family member to have an ornament.  I traced letters onto small strips of contact paper.  Us

Garland Christmas Trees

Image
I always see nice tabletop decorations but refuse to spen d an arm and a leg o n a piece that won't sit out but a month.  I wanted something festive and sparkly for the dining table and decided I can make my own. I grabbed some garland from the dollar store and rolled up some poster board to make my own tree forms.  Using hot glue, I started at the top and rolled the garland around the sides, gluing every couple inches. Now I have three trees for cheap.  The blue and silver one is my favorite.   I set them on the dining table.  Here are the silver ones. And the blue and silver one on the other end.   I mixed some red along with the blue in my table to pull the colors from the rest of the downstairs.  I grabbed the blue chargers in Michaels last week.  The centerpiece is a glass vase with silver and blue balls.  A small wreath with red berries sits at the base.  I kept the smaller vases and candles on the sides.   There are more tweaks I want to ma

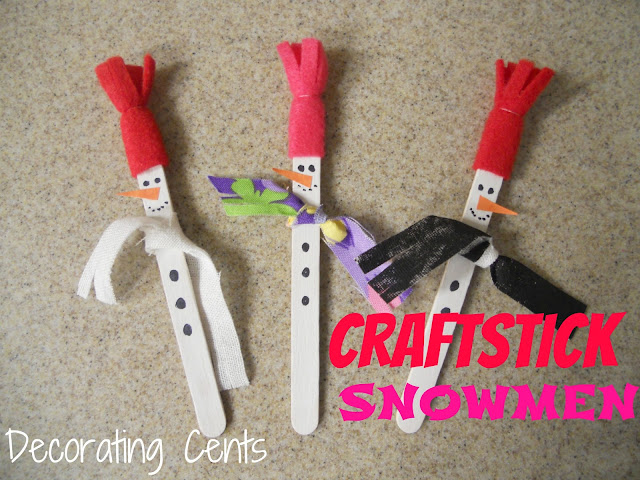
Craft Stick Snowmen

Image
I'm excited to share a fun and easy Christmas project you can do with the kiddos.  My daughter loves any kind of crafting so this is something she was happy to join along in. Let's get started.  You will need craft sticks white craft paint brush  black marker felt or fabric  scissors glue string 1. Start by painting the craft sticks white.   2. Cut small squares of felt to use for the hats.  Cut small strips at the top so the hats will look fringed.   3. Wrap the felt around the tops of the sticks and secure with glue.  Tie a piece of string around it.   4. Cut small strips of fabric and tie around the snowmen necks so they become scarves.   5. Using a marker, draw the faces and buttons down the front.  I used small strips of orange paper to make the noses.   Aren't they cute?  Something you can have the kids do without too much mess.  They would make good ornaments or fridge magnets.   Sharing with I Heart Naptime * Un der

Kitchen Lighting Part 2

Image
Next up, getting the pendant lighting put up.  I think that's the major element our kitchen was missing.  To me it fills in the empty space between the ceiling and island and almost creates a separation of the kitchen from the family room.  The pendant would be mounted where the former recessed light was.  To make things a little easier, we opted to replace it with something that has one connection box with several pendants attached instead of drilling more holes to hang individual pendants. We found a pendant fixture in Lowes that would do the trick.  We went with a pendant bar in nickel and blue crackled glass pendant shades.  Problem is, the can light left a hole that is seven inches wide and the bar for the pendant light is only five inches wide.   This bar is not going to cover that huge hole.  What to do, what to do?  After searching online, I found several videos where we can add a box to the gaping hole and just patch around it.   We used a ceiling brace s imila

Countdown To Christmas: Snowman Advent

Image
The kid has been asking about Christmas.  The Toys R Us book came a few weeks ago and I can't tell you how many times she's looked through it and told me how many things she needs from it.  Really?  A four year old needing a three story Barbie house?  I guess. Since she's so excited this year, I decided to let her make her own countdown calendar.  I like the one from last year but we really didn't put it to use.  We didn't stick with the activities and ended up in the closet.  So here's what I came up with.  I traced two circles from poster board and glued them together.  She glued on googly eyes, a nose, a hat from scrapbook paper, and drew on a mouth.  Simple and I feel better that this one will actually get used daily.  I hung it on the refrigerator for easy access. Each day, starting with December 1, a cotton ball get's glued on the day's number.  By Christmas eve, the snowman will be full and fluffy and the next morning is Christmas. 

Kitchen Lighting Part 1

Image
Since we made the move to have the secondary bedrooms overhead lights installed , we decided to go ahead and get the kitchen lighting done too.  Ever since we moved in, I've wanted recessed lights around the room and pendants above the kitchen island.  We had two humongous box lights and one recessed light in the middle.  I never understood the thinking of the contractors and why only one recessed light was installed. First step was to remove the box lights and put in the new recessed  lights.  We went with a five inch recessed light kit from Lowes.  I didn't want anything too large.   I had already marked where I wanted the recessed lights to go.  There would be six total.  The goal was to keep the two center holes where the box lights were and add four more holes for the other lights along the outside.   Things don't always go according to plan.  The hole closet to the family room was on a beam and the can couldn't be put inside.  This meant

Happy Thanksgiving

Image
Here's wishing you and your family a happy and safe Thanksgiving. Be thankful for everything and everyone in your life. And oh yeah...don't eat too much, I know I will!  

Changing The Girl's Room Light

Image
I told you last week we finally added ceiling lights to the secondary bedrooms.  That meant we got to pick out a pretty light for my daughter's room.  I had seen this one at Ikea before and knew I couldn't do anything with it at the time.  It would have to be plugged in and swagged just like the paper lantern that was previously in her room.  Knappa While in Lowes getting some supplies, I saw this one.  It was almost identical.  The best part about it, it came with a canopy and could be installed at the ceiling light box.  This one is larger by about 5 inches and has one less row of petals.  Didn't matter to me.  It was perfect for her space. Sydney It reminded me a lot of a flower and I knew my daughter would like it.  Girly but very modern.  I couldn't wait to get it up.  With the light on... I love the pretty glow at night.  I feel like my daughter's graduated a little into something a little more mature.  What do you think?