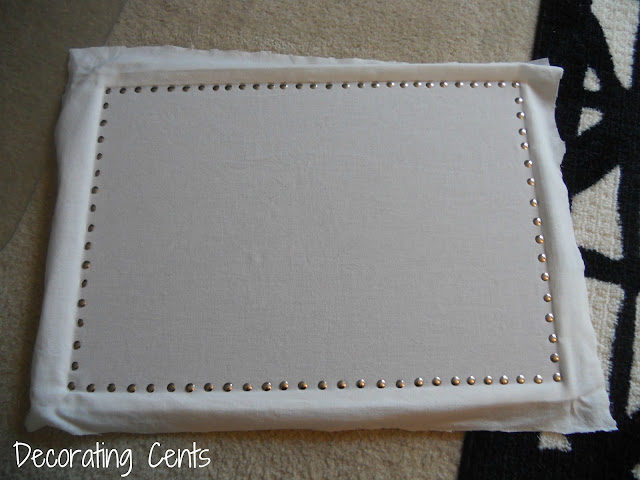
Faux Nailhead Pinboard
Well guess who decided to start back up on the office again? We did. We use it almost everyday and it was bothering me that we started this room and didn't finish. Oh wait, that's a lot of projects in my house. I think my daughter's room is the only room I can call finished.
I snagged this pinboard at a thrift store for maybe $0.50. I had no idea what I was going to do with it but for that cheap I'll find something. After seeing several ideas on Pinterest, I knew what to do. Cover it with fabric to hide the ugly cork and out it in the office. I bought some thumb tacks for the trim and got to work.
I had some white fabric in my stash so of course I used it. No need to buy new. I ironed the fabric and placed it over the cork.
I thought the silver tacks would add some industrial to it. I started in the corner and worked my way around filling in the gaps.
After the tacks were in, I cut the fabric so a couple inches were left on either side. I used packing tape to secure the fabric on the back side. Who's gonna see the back?
I had on old frame I wasn't using and took the hanging pieces from it and attached it under the frame of the pinboard.
No we have somewhere to place those important pieces of paper (or magazine cutouts).
Office plans:
paint the walls
new desk
shelves above the desk
create a small sitting area
new chair
add a rug
wall art
window treatments
I had some white fabric in my stash so of course I used it. No need to buy new. I ironed the fabric and placed it over the cork.
I thought the silver tacks would add some industrial to it. I started in the corner and worked my way around filling in the gaps.
After the tacks were in, I cut the fabric so a couple inches were left on either side. I used packing tape to secure the fabric on the back side. Who's gonna see the back?
I had on old frame I wasn't using and took the hanging pieces from it and attached it under the frame of the pinboard.
No we have somewhere to place those important pieces of paper (or magazine cutouts).
Office plans:
shelves above the desk
create a small sitting area
new chair
wall art
window treatments

Sharing with
Today's Creative Blog * Confessions of a Stay at Home Mommy * The Gunny Sack * Making the World Cuter * Under the Table and Dreaming * The DIY Showoff * It's So Very Cheri * It's Overflowing * I Heart Naptime * Positively Splendid * Tip Junkie * Home Stories A to Z * A Bowl Full of Lemons * How to Nest for Less * Not Just a Housewife * Chef in Training * My Uncommon Slice of Suburbia * DIY by Design * Southern Lovely * Ginger Snap Crafts * Savvy Southern Style * Clean and Scentsible * House of Hepworths * Bear Rabbit Bear * The 36th Avenue * Sassy Sites * The Shabby Nest * Five Days Five Ways * Remodelaholic * Chic on a Shoestring Decorating * Tatertots and Jello * Happy Hour Projects * I Heart Organizing *


I like the look of the tacks. Turned out nice.
ReplyDeleteMelissa
www.lovebugliving.com
Love the clean simple look.
ReplyDeleteThis is nice and very creative!
ReplyDeleteGreat idea to use thumbtacks as nailhead trim!
ReplyDeleteSuch a great idea! I love the way you covered up the ugly frame too!
ReplyDeleteOh I love this! So nifty to use thumb tacks too =) Might have to make one of these for my office!
ReplyDeleteVisiting from Today's Creative Blog
I love this idea. I copied it with zebra pink and white fabric for my daughter's room. I had everything to do this project except the fabric.
ReplyDeleteWhat did you use to hang it? nails, picture hooks?
Thanks for the idea,
Tasha
momofsbandeg@yahoo.com
Your memo board turned out so pretty and chic, the nail heads make all the difference! Thank you so much for linking up!
ReplyDeletexo,
Jen