Sweet Girl's Room: Easy DIY Art
I've started on projects for my daughter's room. Filling her walls is my first task. Her room is huge so I have lots of wall to work with. The entrance wall is long so I know a couple pieces is not gonna cut it and kids art is expensive. Once again I searched for ideas. I've seen lots of picture walls in kids rooms so I decided to go with it.
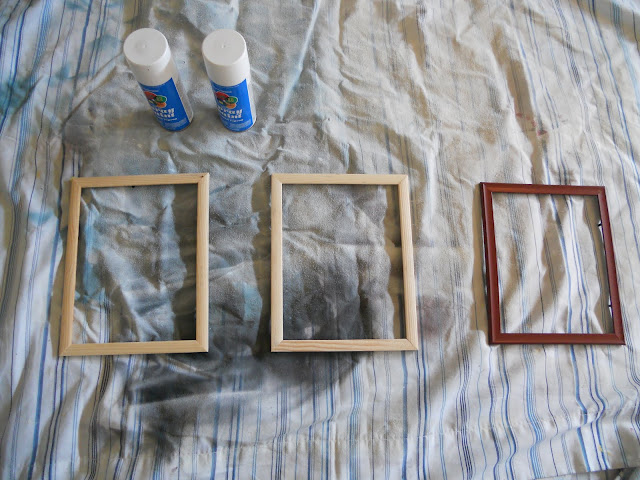
I needed frames, lots of them. I got an assortment from Michael's, the Dollar Tree, thrift stores, and a few I already had. The ones from the Dollar Tree even have mattes in them. The frames are all different sizes and colors. Since they all need to match, I decided to paint them all white.


These all have cute pictures but with a one word tag line. The yellow dragonfly says 'explore', the pink butterfly says 'become', and the blue bees says 'wish'. I thought these all were appropriate for a young girl. And how ironic that she wants butterflies and they symbolize a new beginning and change. These pieces will transition with her in this space and inspire her as she gets older.
I saw a new website to create wordart, called Wordle. You enter in some words and it spews out a cute little piece of art.

You can choose the colors, fonts, and how random you want to words to be laid out. It gave me a way to add personalization to her art. I wanted her name and some words that describe her. I used the colors that will be in her room.
Next was something I've seen around blogland a few times, a birth print. It has some details about your child's birth.

I blocked out my kid's whole name for security reasons. I thought this print was cute and added another level of personalization.
Here some more where I just used scrapbook paper. The 2 dragonfly pictures are cut and mounted to the top of the scrapbook paper and inserted in the frames. The other is a piece of the scrapbook paper matted.


I thought these were fun and cheap ways to add art to her expansive wall.
Linking to:
Under the Table and Dreaming * The DIY Showoff * Funky Junk Interiors * Dittle Dattle * Debbiedoo's * Sassy Sites * Home Stories A to Z * Thrifty Decor Chick * House of Hepworths * The Shabby Creek Cottage * Just a Girl * Remodelaholic * Coastal Charm * Giggles, Glitz & Glam * Bear Rabbit Bear * The Girl Creative * Crafty Confessions * Momnivore's Dilemma * Fireflies and Jellybeans * Smile Monsters * Growing Up Gardner *
I needed frames, lots of them. I got an assortment from Michael's, the Dollar Tree, thrift stores, and a few I already had. The ones from the Dollar Tree even have mattes in them. The frames are all different sizes and colors. Since they all need to match, I decided to paint them all white.

Next was trying to decide what to put in them. She wants butterflies so I've been on the hunt for butterfly prints. I found these on Art.com. Just printed them on regular printed paper and stuck them in the matted frames.

Also on Art.com there were some prints by Peter Horjus that were pretty and had some meaning behind them.

I saw a new website to create wordart, called Wordle. You enter in some words and it spews out a cute little piece of art.

Next was something I've seen around blogland a few times, a birth print. It has some details about your child's birth.

Here some more where I just used scrapbook paper. The 2 dragonfly pictures are cut and mounted to the top of the scrapbook paper and inserted in the frames. The other is a piece of the scrapbook paper matted.


I thought these were fun and cheap ways to add art to her expansive wall.
Linking to:
Under the Table and Dreaming * The DIY Showoff * Funky Junk Interiors * Dittle Dattle * Debbiedoo's * Sassy Sites * Home Stories A to Z * Thrifty Decor Chick * House of Hepworths * The Shabby Creek Cottage * Just a Girl * Remodelaholic * Coastal Charm * Giggles, Glitz & Glam * Bear Rabbit Bear * The Girl Creative * Crafty Confessions * Momnivore's Dilemma * Fireflies and Jellybeans * Smile Monsters * Growing Up Gardner *


I love it! So cute and colorful, not to mention you made it your own custom work. Thanks for sharing and joining with my newbie party. I became a new friend too. Hope to see you again weekly.
ReplyDeletethis is such a great idea and is really sharp too!
ReplyDeleteThese are so girly and pretty! I love how resourceful you were in creating the art work you hung.
ReplyDeleteI'm your newest follower.
I love these, very cute!
ReplyDeleteIf you don't mind sharing, how do you print from art.com?
Cute stuff! I'm going to check out wordle. Looks interesting. (Visiting from Home Stories A2Z)
ReplyDeleteI have the same question Imani asked. I went to the sight an enlarged the image by clicking on it but it has a waterseal/mark. I suppose that that doesn't show when you print it or maybe it does and it's so light you can't see it.
ReplyDeleteSo cute! I love this. :) Thanks for linking up!
ReplyDeleteGreat job! Visiting from Kidding Around Friday!
ReplyDelete