Posts

Showing posts with the label master bathroom

An Organized Linen Closet

Image
Good morning friends! I have joined some of my favorite blogging ladies for #4daysoforganizing. We are all sharing some tips on organizing our homes in the new year. If you are visiting from The Handy Home Girl , welcome! Come on in! If you are like me, I have decided that I need to get my home in order. I like to think of myself as an organized person but there are many areas of my home that I lack a system for. The first being my pantry but that is going to take more time than I have right now. I have decided that I will start with the linen closet in our master bathroom. The before isn't horrible but you can see that we just kind of tossed things in without thought. We knew where things were. Having wire shelves can prove to be difficult because things fall between the cracks and bottles don't sit up straight. It is frustrating to balance a small bottle just right on the shelf. The first thing I did was pull everything out of the closet. I did this so I ...
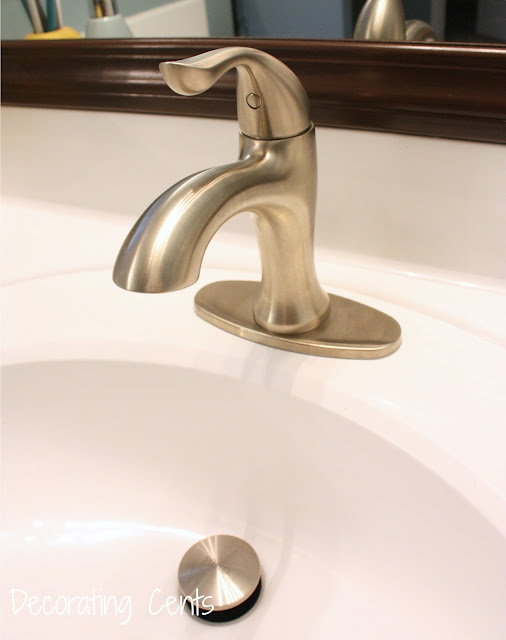
Bathroom Faucets From Pfister

Image
Good morning!  Now that we're pa st the hurdle called Monday, the rest of the week should be great right? Our master bathroom has been a s low work in progress.  It was painted and mirro rs framed but that's about it.  As a homeowner, you start realizing how much everything costs and th at 'to-do' list suddenly becomes a 'let 's save up for it' list.  One thing I can now check off that to-do list is faucets.     I wanted something curvy but modern in a nickel finish and these fit the bill just fine.  This is the Elden Single Control faucet .  I love them.  We have 3 holes on our sinks but that wasn't a problem.  The faucets came with a deck plate to cover the other two holes.  The number of holes in your sink is something you definitely have to remember.   The faucets were super simple to install. The hardest part was removing the old faucets.   I wanted a faucet with a single handle....

Framing The Bathroom Mirrors

Image
I wanted the bathroom mirrors framed.  I didn't really like how they floated on the wall.  Here's how we did it. Supplies used: Miter box and saw four 7' pieces of fiber board casing paint liquid nails caulk We started by choosing the frame material we wanted.  Lowes has several options.  We chose to go with a fiberboard since it was lightweight and probably wouldn't warp over time due to the moisture in the bathroom.  We also chose the darker, wood-like board since we were painting the frame dark anyway to match the painted vanities.   Our bathroom mirrors are 42" tall and 35.5" wide.  Our frame would sit right on top so these are the measurements we wanted the outside of the frames to be.  After choosing the frame material, we went over the cutting desk and found out their cutting machine only makes straight cuts, not 45 degree angles.  Um...how can that be?  What if I don't have a saw at home?...

The Master Bathroom Is Painted

Image
Yay!  We've made a change to the master bathroom.  We painted the walls Harmonious by Behr.  It's a calming blue that goes well with the dark vanities.  We both want a spa-like experience when we come in here so we both agreed this was the best color.  I said agreed but this was after several back and forths in Home Depot.  We just couldn't agree on the same color at first.  I was going for something light and he wanted something dark.  I think we found a happy medium. I need something big to put over the tub here and a nice valance or roman shade for the window. I can't wait to choose new lights and accessories. Here's what I have in mind. Master Bathroom to do list: Paint walls Paint cabinets Frame mirrors Change light fixtures Install tile above tub Window treatment Art above tub  

Our Master Bathroom

Image
One of the features that sold us on this house was the master bathroom.  We came from a small bathroom and sharing one sink, making it nearly impossible getting ready for work in the mornings at the same time.  One of us often used my daughter's bathroom so we weren't in each others way.  This bathroom has double vanities, a garden tub, and separate shower.  The first project we did in here was the cabinet transformation .  It made a big impact on the feel of the bathroom.  Now it's time to change the rest of the room. This is hubby's side. This is my side.  So glad we have our own counter space.  No more waiting our turn for the mirror to brush our teeth or do hair.  Makes getting ready in the morning so much smoother.  I hate these bar lights.  They are in every bathroom and guess what, they all have to go. In the middle of the vanities is the garden tub.  I've maybe used it once.  Probably because ...

Cabinet Transformations

Image
I told you that we want to stain the kitchen cabinets dark.  I mentioned to my husband that Home Depot carries a cabinet painting kit called Cabinet Transformations .  The kit includes everything you need to change the color of your cabinets WITHOUT SANDING!   So we made our weekly trip to the local Depot and got our kit.  Since the kitchen will be such a large project, we decided to try it out on our master bathroom cabinets. They are the same light maple as the kitchen cabinets. Our bathroom was the perfect place test this kit.  If we didn't like it, no one would see it and we could change it whenever.  If we started with the kitchen and didn't like it, we would have to change it immediately because everyone would see it. The kit includes deglosser for removing the sheen from the cabinets, bond coat in your choice of color, glaze (optional), and protective top coat.  There are several colors to choose from.  We wanted dark so ...