Posts

Showing posts with the label DIY

DIY Acrylic Tray

Image
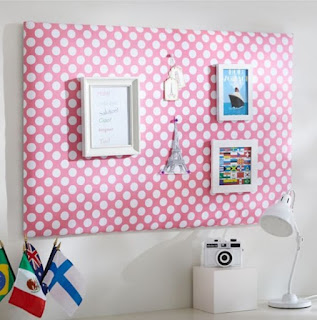
Hump day!  We're half way there. So glad my daughter's room is finally finished.  I love the gray walls with pops of color throughout.  Her desk is one of the areas she uses the most.  She likes to sit there and do legos or draw.  She tends to collect a lot of paper so I wanted a tray to corral all of it.  I made a simple acrylic tray in my office so it was a no-brainer to make one for her too. I bought a plastic frame from Michael's and some pretty scrapbook paper. Cut the paper to size to fit into the frame. Boom!   Done !   So simple but so cute! Here it is on the corner of her desk.  I love how it's not bulky and since it's clear, you can still see the desk.  It doesn't always stay as clean as I'd like it, but it w orks. What's the easiest project you've tackled lately? In case you missed it, the room reveal is here .   You're reading DIY Acrylic Tray b y Andrea, originally posted on...

DIY Blanket Ladder

Image
Hey good people.  Ha ppy Wednesday. I had a corner of the living room that was always empty.  I never knew quite what I wanted there.  I had always seen these ladders around the internet and thought about making one but never got around to it. So one day I decided to just go for it.  It was an easy project so I don't know what took me so long. Supplies: (2) 2x2x8 furring strips (8) 2 inch wood screws Stain of your choice I started with eight foot pieces.  They were less than $2 a piece.  I had the fine gentleman at Lowes cut them down for me.  Each eight foot piece was cut down to (1) five foot piece and (2) eighteen inch pieces.  This would give me a five foot tall ladder with eighteen inch rungs. I laid out my pieces to assemble.  The top rung is six inches from the top.  The remaining rungs are 12 inches apart from the top of the previous rung. Using two inch wood screws, attach the rungs to the...

Favorites of 2016

Image
Can you believe only one more day of 2016 left?  Where does time go? Christmas was great and the house is filled with new toys and excited kids.  I tried something new this year and used the traditional red in my Christmas decor.  I really like it. I like to go back and see what all I've accomplished over the year.  Let's re-cap projects of 2016 shall we? The biggest was probably my son's room makeover . I love the DIY engineering print I put on his wall. I replaced the shelves above his dresser with a photo gallery. My husband and I took a leap and opened an Etsy shop .  More gr eat prints are coming in the new year. I started my daughter's room makeover this year too!  The walls have gone from green to gray and some minor changes to the room like gold polka dots have made the room feel girly and g lam .  It's taken me a little longer than I planned but I am 99% done. We've been in ...

DIY Wooden Bead Garland

Image
These bead garlands have been popping up all over the place.  I've seen them in so many vignettes around blogland and I knew I wanted some.  Thing is I never actually looked for them.  It was something I knew I could make.  Well fast forward a few months and that's exactly what I did. This was a super simple DIY.  I bought two sizes of wood beads from Michael's.  I bought the ones with holes already in them but they do carry more sizes that do not have holes.  I wasn't in the mood to drill my own holes.  I also bought some twine for stringing the beads. I laid out my beads how I knew I wanted to string them.  I put the larger beads in the center and placed the smaller beads along the ends for a graduated look. I strung my beads onto the twine and spaced them out slightly so my garland would have some give to it.  If not, the strand would be too stiff and not move much.  I knotted the ends, cut the excess twi...

Wooden Blessed Sign

Image
Is it M onday already ?   I don't know about you guys, but I have lots of wood scraps laying around in the garage.  I decided to put them to use.  I like quote signs so this was an obvious choice.   I chose a small piece of 1x4 and got to work.  With the addition of craft paint and a brush, this was an easy little project. I first painted my wood with some black craft paint usin g m y foam brush .  Since I don't have a cutting machine and I didn't bother to print and trace a stencil, I free-handed the words in pen cil so I could e rase if I m ade a mistake.  W hich I did several times .  I chose the word blessed. After a few coats of white paint to fill in my words, I had a cheap little sign I could put anywhere.  I used a tiny bristled brush for this step. I paired it with my painted pumpkins for fall in the dining room. How cute is this little wire ba s ket I found in Do llar Tree? I kn...

Updated Board and Batten

Image
Hello and welcome to Friday.  Can I get a w hoop whoop ? A few weekends ago I decided it was time to upgrade the boa rd and batten in the back entry.  I wanted it to be a little taller and more hooks.  I felt like only the kids had room for th eir jacke ts and backpacks.  Their stuff was hogging it all. Well now every one's got some space.  We do have a coat closet to the left but it's easy to ju st walk in and hang up your purse or jacket without immediately goi ng to the closet. I had some leftover pieces from the bottom poplar boards in the garage so I just extended it up.  I like the two rows of hooks instead of just the one. I had to buy a 1x4 for the top horizontal board and a 1x2 for the ledge.  I like the little ledge at the top so I can lean stuff on it.  For now it's got my paint stick project and a blue monogram.  It also gives it a finished look. Check out those hooks.  I originally was going to go with...

PB Teen Inspired Pinboard

Image
On Monday I showed you the plans for my daughter's room makeover.  For her desk area, she wanted a place to hang her artwork and the little notes that she writes.  I decided a pinboard was the perfect solution.  We both really like this pink polka dot one from PB Teen but $89 is a lot for me to swallow.  Nothing like a good 'ole DIY project to the rescue. I picked up a large pinboard from Goodwill for a few bucks. I originally wanted to paint the frame white but decided to just cover the whole thing with fabric.  I picked up some pink printed fabric from Hobby Lobby.  To start, I laid the fabric over the board and centered it.  I tried to line up the fabric along the edges as best as I could to keep the pattern straight. I used silver push pins around the edges to create a nail head look. I spaced the pins an inch apart using a yard stick.  Pushing in ALL.THOSE.PINS took the longest.  I would push one in only ...