DIY Drum Chandelier

I've noticed the new trend of Drum Chandeliers. I knew I wanted an updated fixture over the breakfast area besides the ugly one that we acquired with the house. I hadn't changed it yet because I wasn't sure what I wanted to go over the table. After seeing a couple versions of it by Jackie and Carrie, I thought a drum chandelier would be a great modern and casual update.
I went to Lowes to grab the Portfolio Mini Pendant Light Fixture. The had a good selection of shades to choose from, whether it be glass or lamp shade. I ended up choosing an off white shade after searching several other stores.

The pendant was pretty easy to put together.

1. Gather your supplies: light pendant kit, shade, nipples, and couplings.
2. Dis-assemble the light kit by unscrewing the rods and canopy from the socket.
3. Screw on a coupling and nipple. This lengthens the piece on which your shade sits on.
4. Slide your shade onto the cord and rest it on the coupling.

5. Screw the first rod onto the nipple. Add the remaining 2 rods one at a time.
6. Remove the inside bar from the canopy.
7. Slide the canopy over the wire. The canopy insert rotates so you easily do this.
8. Once the wire is inserted, straighten the canopy. Follow the instructions to mount to the ceiling.
It was that easy. Look at the difference.

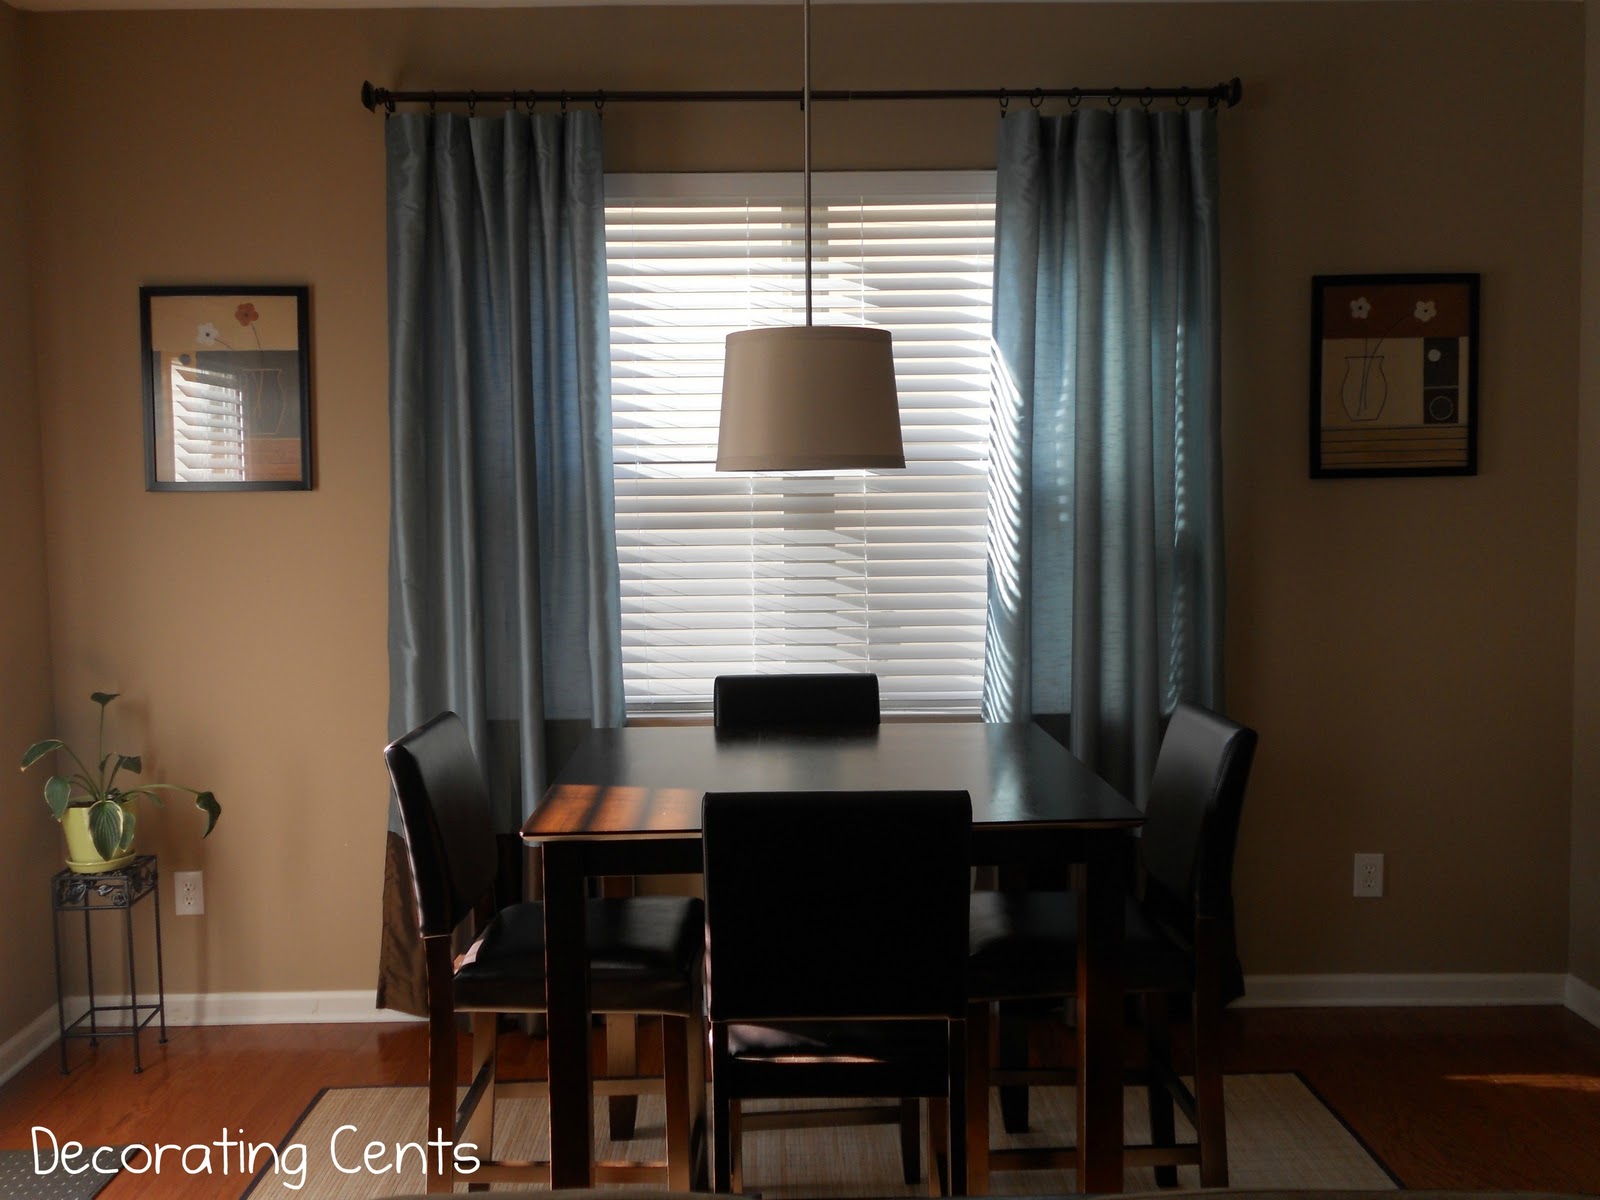


Now I have an updated light that matches the house. Now I'm pondering covering the shade with some pretty fabric. But which fabric?

Sharing with
Homemaker on a Dime * Making the World Cuter * Keeping it Simple * Between Naps on the Porch * Skip to my Lou * Be Colorful * Sumo's Sweet Stuff * Marvelously Messy * DIY Home Sweet Home * Dittle Dattle * The Gunny Sack * Home Savvy A to Z * Debbiedoo's * Creating My Way to Success * I Heart Naptime * Under the Table and Dreaming * Flamingo Toes * Don't Waste Your Homemaking * I Can't Stop Crafting * Home Stories A to Z * My Uncommon Slice of Suburbia * Confessions of a Stay at Home Mommy * Coastal Charm * Sugar Bee Crafts * Tip Junkie * Strictly Homemade * A Bowl Full of Lemons * Chef in Training * Type A Decorating * Funky Polka Dot Giraffe * Project Queen * Today's Creative Blog * Clean and Scentsible * Blue Cricket Design * Ginger Snap Crafts * Savvy Southern Style * DIY by Design * Sweet Peas and Bumblebees * Southern Lovely * Handy Man Crafty Woman * Someday Crafts * Organize and Decorate Everything * Primp * House of Hepworths * Bear Rabbit Bear * The Shabby Creek Cottage * Delightful Order * The 36th Avenue * Somewhat Simple * A Glimpse Inside * The Crafty Blog Stalker * No Minimalist Here * Yesterday on Tuesday * 2805 * Chic on a Shoestring Decorating * Remodelaholic * Lovely Crafty Home * Sassy Sites * The Shabby Nest * Home Savvy A to Z * Tatertots and Jello * The DIY Showoff * Mad in Crafts * Thrifty Decor Chick * Fingerprints on the Fridge * Kojo Designs * Finding Fabulous * Fun to Craft * Tough Cookie Mommy * Thrifty Inspirations *


Thank you so much for sharing --- this is a great project!
ReplyDeleteBlessings, Becky
Isn't it so awesome how a light fixture can update a space!! Great job!!
ReplyDeleteoh wow its a noticeable transformation.
ReplyDeleteWould luv for my readers to discover your blog, will you please join our weekly party at
http://www.passionatelyartistic.com/2011/11/thanksgiving-showcase-tutorial-with.html
have a great crafting week!
Maggie
http://passionatelyartistic.com
Looks great! Totally transforms the area!
ReplyDeleteOh my, your updated chandelier makes your whole space look more sophisticated! I love it! P-l-e-a-s-e come and link up to the Head to Head Showdown, going on right now at www.icantstopcrafting.blogspot.com
ReplyDelete~jen
What a nice change! A funky graphic print would be awesome. This is an idea that I had pinned
ReplyDeletehttp://kimboscrafts.blogspot.com/2011/08/diy-drum-shade.html
Thanks for sharing!
It looks beautiful. And boy do I command you for being able to do the whole thing.
ReplyDeleteI hate the one I have over my dinning room table but hubby does not want to change it. Wish I had the know-how to do it myself......
I love this update! It looks great!
ReplyDeleteCheers to you girl! You did a fabulous job. Thanks for sharing with my newbie party.
ReplyDeleteOh I want to do the same thing over my kitchen table...thanks for the great little tutorial. Your blog is great, look forward to following along with ya.
ReplyDeleteOver from Debbie's Newbie Party, come on over to mine when you have time, http://ourbluefrontdoor.bloodspot.com
Would love for you to follow
Hope you have a great week,
Andrea
What a lovely change - and a great tutorial!
ReplyDeleteThanks for linking to a Round Tuit!
Hope you have a great week!
Jill @ Creating my way to Success
http://www.jembellish.blogspot.com/
Very nice!
ReplyDeleteI got a plain drum shade this fall & I plan to cover it with an old map & use it on a lamp.
I'm a new follower!
Hugs,
Steph @ Silver Boxes
Looks so easy, makes me want to do it. I have the perfect shade for it also. I'm your newest follower and came over from projectQueen
ReplyDeleteThis is a fantastic idea...I gotta try it. On another note...How do you have all your party links in a typed list that has a working link...I am new to blogging and I would love to know how to do this (copy and paste, repeat is getting old) Thanks for any advice
ReplyDeleteVery nice! Now can I recruit you to come and help me out? lol:)
ReplyDeleteI love the change, maybe find a graphic fabric that brings in the blue from the curtains?
ReplyDeletehttp://chickenscratchny.blogspot.com
Great tutorial! I'd love to see that drum shade in a fun graphic print. I think you could get away with something bolder since it's such a statement piece. Looking forward to seeing what you end up doing. Thanks for sharing.
ReplyDeleteI'm hosting my monthly Before Blogging Throwback Thursdays Party and would love for you to drop by and share something you made / did / bought sometime Before Blogging. Can't wait to see what you bring to the party.
Oooo! I love the idea of covering it in a fun fabric, too! That is such a great and easy update...it made a great difference!
ReplyDeleteYour new light looks beautiful! There's just something so appealing about the drum shade style. :)
ReplyDeleteCongrats on such a professional looking job! Thank you for sharing you project at Potpourri Friday!
ReplyDeleteThanks for doing such a great tutorial. I've been wanting to try this for a while! It really freshens up the space! Could you link it up to my party?
ReplyDeletehttp://daysofchalkandchocolate.blogspot.com/2011/11/latest-and-greatest-friday-6-and.html
Looks fabulous...makes such a difference and doesn't sound as though it was too stressful for you! :)
ReplyDeletewhat a great tutorial. I have wanted to try this.. I found you on the link parties.. I am your newest follower.. If you would like to check out my blog to that would be so great, and follow me back and facebook too. I will be doing free giveaways here shortly on clothing and mineral makeup :)
ReplyDelete-Thanks
Brooke
blushboutiquestyle.blogspot.com
Loved this and wanted you to know I featured it tonight on this week's Motivated Monday at BeColorful
ReplyDeletePam
Looks beautiful! Thanks for linking up with us and hope you join us again this Wednesday! Happy Thanksgiving!
ReplyDeleteMarie
mylilpinkpocket.blogspot.com
Such a simple solution to make a drum shade. Great job It looks lovely!
ReplyDeleteLooks great!! Thanks for auditioning for OMTWI!
ReplyDeleteThanks for sharing. Great tutorial and it looks great.
ReplyDeleteCheri
I really love it. Can't believe you made it from scratch. The whole room looks really great.
ReplyDeleteWarmly, Michelle
Andrea,
ReplyDeleteThank you so much for taking time to share your project. I have been struggling with finding an economical way to change the ugly, builder-grade, gold-rimmed, glass fixture for years, but kept coming up at a loss. Your idea gave me "freedom" to run to Lowe's this afternoon, purchase the items, and install the fixture in an hour's time. I'm tickled pink. Thank you!
Jennifer